DIY PC Build Checklist: The Best Components & Compatibility Tips
Building your own computer seems scary at first. Don’t worry, though. With good planning and the right know-how, anyone can put together a powerful machine. You get something made just what you need. This guide covers the essentials for a successful DIY PC build. It walks you through everything to get you started.
TL;DR: Key Takeaways for Your DIY PC Build
- PC components must match socket types, power requirements, and physical dimensions
- Budget 60-70% for CPU and GPU in gaming builds
- Always verify motherboard compatibility before purchasing
- Quality power supplies prevent component damage
- Cable management improves airflow and aesthetics
- Test components outside the case first
- Keep boxes and receipts for warranty purposes
The 9 Essential Components for Your DIY Build
Every functional computer requires these core components. Missing even one prevents your system from operating properly.
1. Central Processing Unit (CPU): The Brain of Your PC
Your processor handles all computational tasks. Modern CPUs feature multiple cores for parallel processing. AMD Ryzen and Intel Core series dominate consumer markets.
Gaming builds need at least 6 cores for smooth performance. Content creators benefit from 8+ cores for video editing and streaming. Clock speeds matter less than core count for most applications.
Consider integrated graphics if you won’t install a dedicated GPU. AMD APUs offer decent performance for basic gaming and media consumption.
2. Motherboard: The Nervous System
Motherboards connect all components together. Socket type must match your chosen CPU exactly. ATX, micro-ATX, and mini-ITX represent common form factors.
Built-in WiFi, Bluetooth, and multiple GPU slots add convenience. More expensive boards include better audio chips and faster networking. Budget options work fine for basic builds.
Check expansion slot quantities before purchasing. Modern systems need PCIe slots for graphics cards and M.2 connectors for fast storage.
3. Memory (RAM): Multitasking Muscle
System memory stores data temporarily for quick access. 16GB handles most gaming and productivity tasks comfortably. Content creation benefits from 32GB or more.
DDR4 remains standard, though DDR5 adoption increases. Speed ratings like 3200MHz or 3600MHz affect performance moderately. Dual-channel kits outperform single sticks.
Match memory specifications to motherboard limits. Some boards support faster speeds only with specific CPU models.
4. Graphics Card (GPU): Visual Powerhouse
Dedicated graphics cards transform gaming experiences dramatically. NVIDIA GeForce and AMD Radeon offer various performance tiers. High-end cards require substantial power and cooling.
VRAM capacity affects texture quality and resolution support. 8GB handles 1440p gaming well. 4K gaming demands 12GB or more for future-proofing.
Consider your monitor resolution when selecting GPUs. 1080p gaming needs less power than 4K displays.
5. Storage (SSD/HDD): Your Digital Library
Solid-state drives boot systems faster and load applications quickly. NVMe M.2 drives offer maximum speed for operating systems. SATA SSDs provide good performance at lower costs.
Traditional hard drives store large files economically. Combine fast SSD boot drives with high-capacity HDD storage for optimal value.
Plan for future storage needs. Games and media files consume increasing space over time.
6. Power Supply Unit (PSU): The Energy Lifeline
Quality power supplies protect expensive components from electrical damage. 80+ certification ratings indicate efficiency levels. Modular cables reduce clutter and improve airflow.
Calculate total system power draw, then add 20% headroom. Gaming systems typically need 650-850W supplies. High-end builds require 1000W+ units.
Never skimp on PSU quality. Cheap units can destroy entire systems during failures.
7. PC Case: The Body and Protector
Cases house and protect internal components. Full-tower, mid-tower, and mini-ITX cases suit different needs. Glass panels showcase internal hardware beautifully.
Airflow design affects component temperatures significantly. Front intake and rear exhaust create positive pressure. Mesh fronts outperform solid panels for cooling.
Measure graphics card length and CPU cooler height before purchasing. Tight fits cause installation headaches.
8. Cooling System: Keeping Temperatures in Check
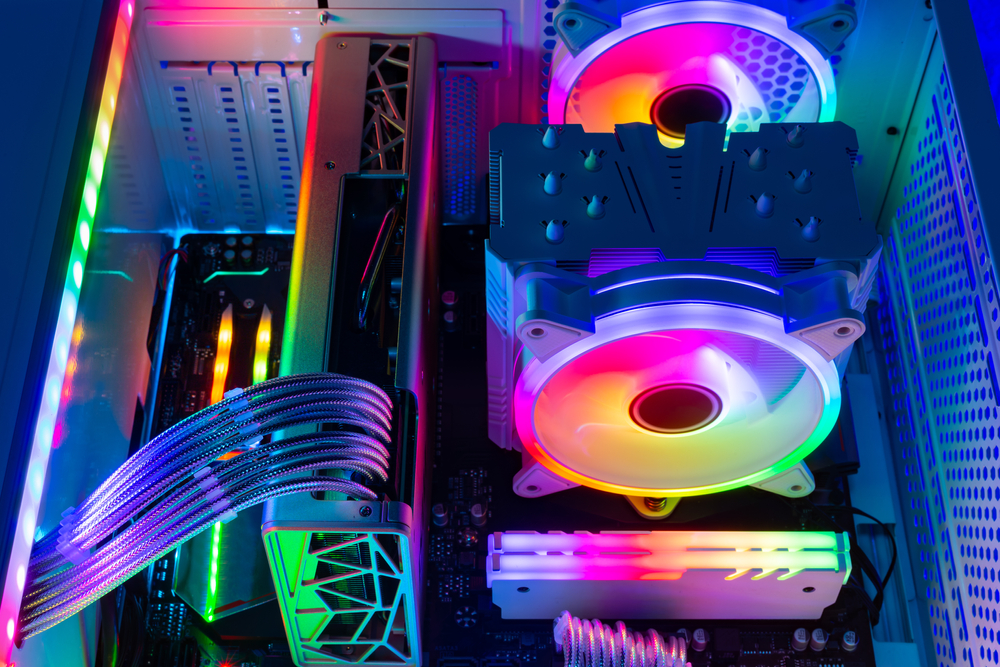
CPU coolers prevent thermal throttling and extend component life. Air coolers offer reliable performance at reasonable costs. Liquid cooling provides superior heat dissipation for overclocking.
Case fans move hot air away from components. Intake fans should exceed exhaust capacity slightly. PWM fans adjust speeds automatically based on temperatures.
Monitor temperatures using software like HWiNFO64. CPUs should stay below 80°C under load. GPUs typically run hotter but shouldn’t exceed 85°C.
9. Operating System (OS): Bringing Your PC to Life
Windows 11 dominates gaming and productivity applications. Linux distributions offer free alternatives with excellent hardware support. macOS requires Apple hardware exclusively.
Purchase legitimate licenses from authorized retailers. Digital downloads eliminate physical media needs. Keep activation keys secure for future reinstallations.
Non-Negotiable Compatibility Checks
PC compatibility issues cause most build failures. Verify these connections before ordering components.
CPU + Motherboard: Socket and Chipset Alignment
Intel and AMD use different socket designs. LGA 1700 supports 12th and 13th generation Intel processors. AM4 handles most modern AMD Ryzen chips.
Chipsets determine feature availability and expansion options. B-series boards offer basic functionality. X-series chipsets include overclocking support and additional connectivity.
BIOS updates sometimes enable newer CPU support. Check manufacturer websites for compatibility lists.
RAM + Motherboard: Speed, Capacity, and DDR Generations
DDR4 and DDR5 memory use different slots physically. Maximum supported speeds vary by motherboard and CPU combinations. QVL (Qualified Vendor Lists) guarantee compatibility.
Dual-channel configuration requires matched pairs. Four-stick setups stress memory controllers more than two-stick arrangements. Higher speeds become unstable with four DIMMs.
GPU + Case: Size and Clearance
Modern graphics cards extend 300mm+ in length. Measure available space from expansion slots to drive cages. Some cases require removing brackets for massive cards.
Triple-slot cards need adequate spacing between PCIe slots. Check motherboard layouts for potential conflicts with other expansion cards.
PSU + Components: Wattage and Connectors
Graphics cards need dedicated PCIe power connectors. High-end models require dual 8-pin connections. Ensure your PSU includes necessary cables.
Modular supplies let you add only required cables. Semi-modular units have essential connections permanently attached. Non-modular designs include all cables fixed.
Cooling + Case: Airflow and Radiator Support
AIO liquid coolers need radiator mounting points. 240mm radiators fit most mid-tower cases. 360mm units require full-tower or specialized designs.
Tower air coolers have height restrictions. Low-profile designs suit compact cases better. Check clearance around RAM slots for large coolers.
Step-by-Step Assembly Walkthrough
Proper assembly order prevents damage and simplifies installation. Take your time and double-check connections.
Pre-Build Prep: Tools and Workspace Setup
Gather Phillips head screwdrivers, anti-static wrist straps, and zip ties. Clean, well-lit workspaces prevent lost screws and component damage. Remove jewelry that might scratch components.
Unbox components carefully and verify contents against PC part checklist. Test power supplies using paperclip method before installation. Keep manuals accessible for reference.
Installing the CPU, RAM, and Cooler
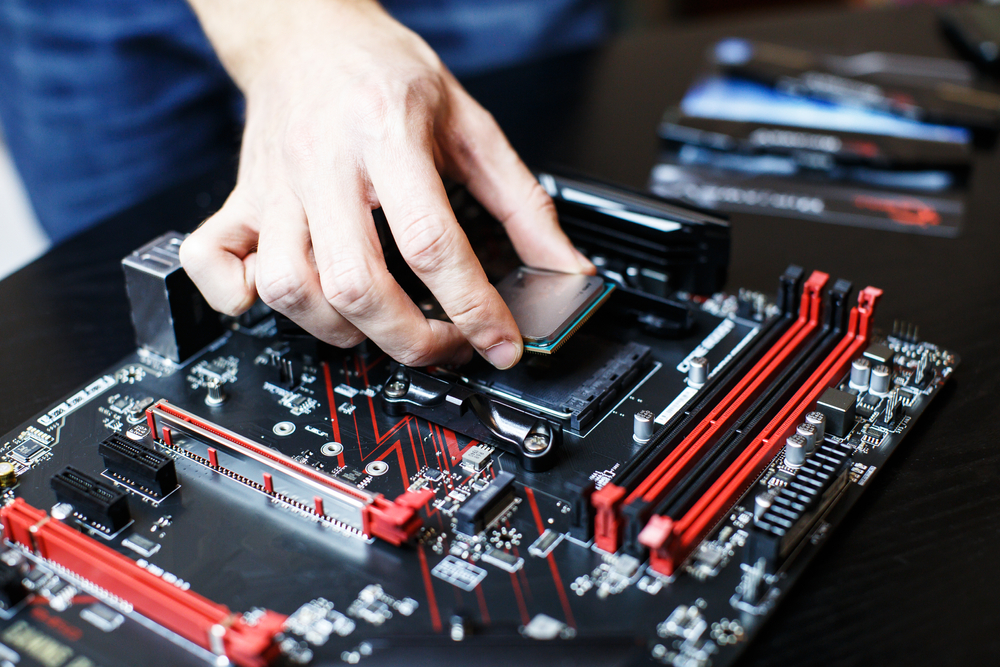
Install CPU first while motherboard sits outside case. Align triangle markers and lower retention arm gently. Never force processors into sockets.
Insert RAM sticks into slots 2 and 4 for dual-channel operation. Press firmly until clips engage audibly. Misaligned memory won’t boot properly.
Mount CPU cooler according to socket type. Apply thermal paste if not pre-applied. Tighten mounting screws gradually in cross patterns.
Mounting the Motherboard and PSU
Install I/O shield in case rear opening first. Mount standoffs in correct positions for your motherboard size. Misplaced standoffs can short circuits.
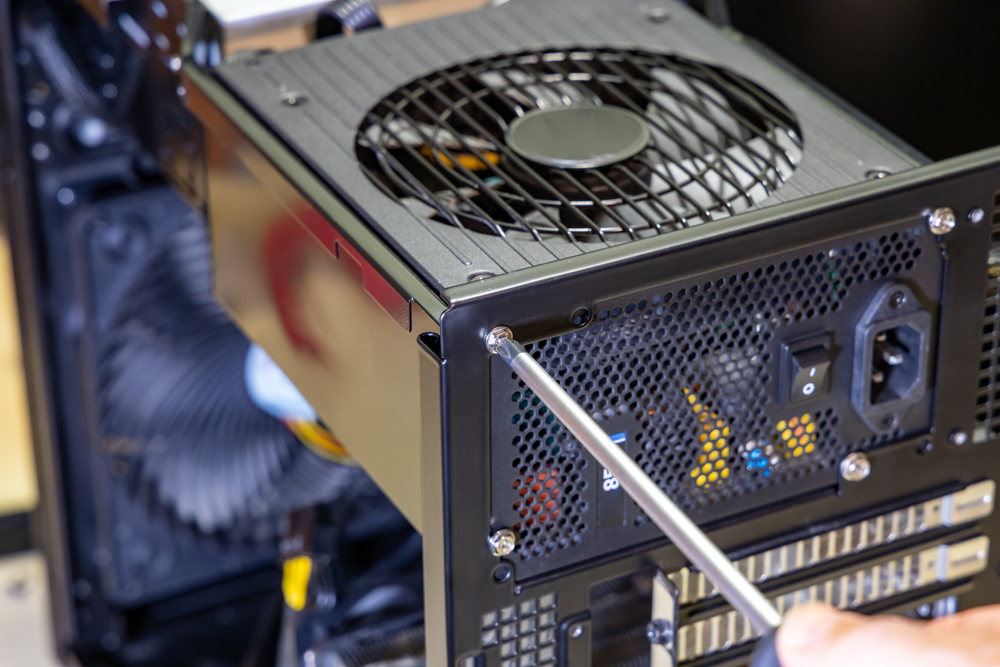
Install power supply with fan facing downward if case has bottom ventilation. Route 24-pin and 8-pin CPU power cables before securing motherboard.
Connect front panel headers carefully. Power button, reset switch, and LED connections vary by manufacturer. Consult motherboard manual for pinouts.
Adding Storage, GPU, and Cable Management
Install M.2 SSDs before graphics cards block access. Secure drives with included screws. SATA drives mount in 3.5″ or 2.5″ bays.
Insert graphics cards into top PCIe x16 slots. Remove appropriate expansion slot covers first. Connect PCIe power cables before seating cards fully.
Route cables behind motherboard tray when possible. Use zip ties sparingly to allow future upgrades. Leave slack for component movement.
First Boot: BIOS Checks and Troubleshooting
Connect monitor to graphics card, not motherboard video outputs. Power on system and enter BIOS immediately. Verify CPU, RAM, and storage detection.
Enable XMP/DOCP profiles for rated memory speeds. Check CPU and system temperatures. Save settings and proceed with OS installation.
Pro Tips to Avoid Common Mistakes
- Install motherboard standoffs in correct positions only
- Connect 8-pin CPU power before seating motherboard
- Remove plastic socket covers after CPU installation
- Test RAM sticks individually if system won’t boot
- Update BIOS before installing newest generation CPUs
- Keep component boxes until warranty periods expire
- Document cable connections with photos for reference
Final Checklist Before Powering On
✓ All power connections secured (24-pin, 8-pin CPU, PCIe)
✓ RAM properly seated in correct slots
✓ Graphics card fully inserted and powered
✓ Storage drives connected and mounted
✓ Front panel headers connected correctly
✓ No loose screws inside case
✓ Monitor connected to graphics card output
✓ Power supply switch in “on” position
FAQ: Your DIY PC Queries Answered
How do I check CPU-motherboard compatibility?
Visit manufacturer websites for official compatibility lists. CPU-Z software identifies current hardware specifications. Socket types must match exactly – Intel LGA 1700 only works with compatible motherboards.
Can I mix RAM brands or speeds?
Mixed memory usually works but runs at slowest stick speeds. Matched kits guarantee optimal performance and stability. Different brands may cause compatibility issues with some motherboards.
Is a 500W PSU enough for a mid-range gaming PC?
Most mid-range builds consume 350-450W under load. A quality 500W unit provides adequate headroom. High-end graphics cards need 650W+ supplies for stable operation.
Do I need thermal paste for my CPU cooler?
Stock coolers include pre-applied paste. Aftermarket coolers may require separate application. Clean old paste completely before reapplying. Pea-sized amounts spread naturally under pressure.
What’s more important: GPU VRAM or clock speed?
VRAM capacity matters more for high resolutions and texture quality. 8GB handles 1440p gaming well. Clock speeds affect frame rates but insufficient VRAM causes stuttering.
How do I troubleshoot if my PC won’t boot?
Check power connections first – 24-pin motherboard and 8-pin CPU power. Test with single RAM stick in different slots. Remove graphics card and use integrated graphics temporarily. Clear CMOS if changes were made recently.
Building your own PC rewards you with exactly what you need. Take time during planning stages. Research compatibility thoroughly. Your custom system will serve you better than any pre-built alternative.
About the Author
